- The Corners of Their Mouth Issue 2 Launch Party is September 7!
- Support me on Patreon or Ko-fi.
In my upcoming piece in Dinner Bell about making jam in a tiny kitchen and food blogging about partners, I finish the piece with the lines, “My favorite part of jam-making is when…I pull [out the jars], tip the water off—and they all pop, no guesswork.” And, while that might have been part of a metaphor for a healthy relationship, I really do take satisfaction in watching food come together, whether that’s lids popping during canning, ice cream thickening, curds and whey separating, or egg whites turning into glossy meringue.
The second recipe I ever published on this blog, back in 2011, was for homemade yogurt. I was so proud of myself for figuring out how to incubate yogurt with the equipment I had (namely, a heated carpet square that I bought thinking it was a whole electric carpet). It was the same thrill I got the first time I made ricotta. Maybe it’s trite to say that I felt like an overly dramatic movie scientist, but if you were to distill the feeling of “IT’S ALIVE” down to its core, turning milk into cheese and yogurt made me feel excited, clever, and, yes, powerful.
There was also the undercurrent of getting a thrill from acts of self-sufficiency. After being suffocated in a toxic relationship and moving to another country where I was learning to cook, yogurt was a sudden realization that, not only I could actually do and make things, but that my newfound skills in food were worthwhile and meaningful. I was—and sometimes still am— so convinced I just could not do certain things, or that I could not do them alone. I don’t even mean really hard emotional things like dumping my abuser but like basic things within my physical ability, like cooking fresh vegetables. Yet when I either had no choice or I was given the freedom to, I discovered I was good at things like making yogurt and cheese, or I worked to be good at them.
I did quit making yogurt after I came back from Japan. This time my stumbling block was that I couldn’t figure out a method that would work for me with my U.S. kitchen equipment. Heating pad technology is a little different here, and while my trusty carpet square was able to run without turning off for hours, I couldn’t bring it with me to the U.S. (voltage) or find anything quite like it. (Also, I moved 5 times in less than 2.5 years and was having very scary financial times for a number of months so it wasn’t on the top of my to-do list.) There are tons of methods to make your own yogurt, but my oven doesn’t have the right settings for using as an incubator; I don’t have a large insulated cooler; and I didn’t want to invest in a yogurt maker, Instant Pot, or a more advanced Crock Pot than the very basic one I own. So I thought about making yogurt again but didn’t really act for several years.
This year, after Robin started their low-carb experimental medical diet, our yogurt consumption doubled. Seeing all the yogurt tubs in the recycling, I decided to try again and to continue my research on how I could make yogurt with what I had, preferably my basic Crock Pot. I finally found Alanna Chernila’s recipe on Eating from the Ground Up, a blog I’ve been reading for a long time; the recipe calls for a basic crock pot like mine and an instant-read thermometer, which I already had, so I was set! (It was also refreshing to read a recipe for something low-carb that wasn’t steeped in body negativity.)
With the stove-top method, I used to get really stressed out because I had to time starting the process for right before going to bed and then babysit the milk for almost an hour. The crockpot method is way more hands off; I can start the milk heating without interrupting dinner or dinner prep to use the stove.*


")
")
Also, I accidentally boiled the milk on my most recent attempt, and you know what 3-4 cups of too-hot milk is good for? Chocolate pudding, specifically the kind thickened with cornstarch, like 2006 The Joy of Cooking’s “Old Fashioned Chocolate Pudding.” And yes, watching that turn from milk, chocolate, sugar, and cornstarch into pudding was also very satisfying. (I then started a new batch of yogurt with fresh milk.)
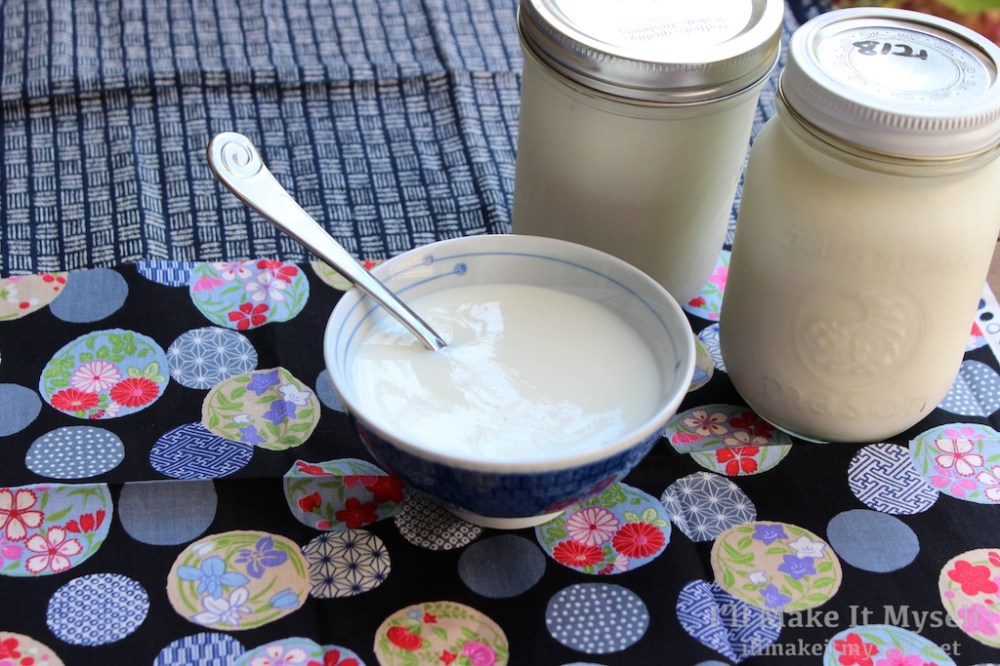
It still feels so cool to see the finished yogurt in the morning. It really doesn’t get old. And I made it myself!
Crock Pot Yogurt
Adapted from “Crock Pot Greek Yogurt” from Eating From The Ground Up, 2012.
Ingredients
- 4 cups (1 quart, 1 liter**) of whole milk (see note on volume)
- ¼ cup (60 mL by volume) of yogurt, room temperature
We use homogenized whole milk (usually Horizon or Trader Joe brand) and Sammish Bay whole-milk yogurt as the starter, but you can use your favorite brand of milk and yogurt. The yogurt will have a flavor and texture similar to your starter.
Equipment
- A slow cooker – I have a 4-quart Rival Crock Pot slow cooker with a low and high setting from about 2007.
- Sterilized Mason jars and lids measuring 4 cups by volume (or equivalent to the volume of milk you start with)***
- A heat-proof measuring cup/bowl with a lip for pouring
- Instant-read thermometer
- You can also use a candy thermometer if needed.
- The instant-read kinds don’t have to be expensive. I have a Thermopop that I got for $25 at a cooking store, and I love it. It can be used for candy, liquids, meat, etc.
- A thick towel or thick washable blanket (I use an old fleece blanket)
- Oven mitts for handling the crock
- Optional: sink or a large heat-proof bowl for the water bath
Procedure
- Advice: The first time you try this, check more frequently and write down the times when the milk is at the right temperature. This is a general guide but your times may vary based on the type and size of your slow cooker, the temperature of your kitchen/home, etc.
- Timing note: I usually begin sterilizing my jars and set the yogurt out to come to room temperature immediately after starting to heat the milk.
- Pour the milk into a clean, room temperature Crock Pot. Cover and set on high.
- For the initial heating to 185º F (85ºC) degrees, I estimate the time to be about about 15-20 minutes per cup of milk (depending on your Crock Pot). If you have 8 cups of milk, it will take 2-2.5 hours; for 4 cups of milk, it takes 1-1.5 hours to heat to 185ºF (85ºC).
- When the milk is 185ºF (85ºC), turn off the Crock Pot and let the milk cool to 114-115º F (45-46ºC). For cool down, I remove the crock from the base and let it sit on a trivet and with the lid cracked for about 30-60 minutes.
- If the milk isn’t cool by then, I make a cold water bath in my sink or a large heat-proof bowl.
- I plug the sink drain and fill the sink about ⅓ full before setting the crock in. The water should come up about ⅓-½ up the crock. (Do NOT let water get into the milk!) You can add some ice cubes to the water bath if you want.
- The bath usually takes 10-15 minutes to get the temperature from to 114ºF (45ºC). It cools very quickly with this method, so check the temperature often! Also, be sure to gently stir the yogurt before checking the temperature if using a cold-water bath, as the temperature will vary (the center tends to cool faster than the edges of the warm crockery).
- Placing a very hot crock directly into ice-cold water may cause the crock to crack, so I do recommend cooling the crock for about 30 minutes before placing it in a cool bath.
- When the milk has cooled to about 114ºF (45ºC), add the yogurt and gently stir. This should make the temperature drop to 110ºF (43ºC).
- If you cool the yogurt too much, you can place the crock into the heating element again on low until it reaches 110ºF (43ºC).
- Place the lid back on the crock. Set a blanket or towel under the heating vessel of the crock pot and put the crock back into the heating vessel so it stays insulated.. Make sure it is off and the crock pot is unplugged. Wrap the crock pot in blankets/towels and let it sit undisturbed to incubate for 8-12 hours.
- Place the crock in the fridge to cool for at least 2 hours. The yogurt will separate some, so stir it back together before pouring it into the jars. (I like pour the yogurt from the crock into a big measuring cup with a lip and use the measuring cup to add to the jars.)
- Good for 7-10 days; reserve some of the yogurt to make the next batch within 5-7 days.
- If the yogurt goes off or doesn’t work as a starter anymore, start again with a new batch using pre-made/store bought yogurt.
Notes
*I should also note that I get up way earlier than I used to due to a different commute, job, and gym time. I used to make the yogurt on the stove around 10 pm, do that hands-on for an hour, incubate overnight, and refrigerate at 8 am for work, but now I usually start the process at 6:00 pm, start incubating around 8-8:30, and refrigerate when I get up at 5 am for work.
**Actually 946 mL, but close enough.
***In the stovetop method I used to use, the yogurt was incubated in the jars, so the jars needed to be hot enough to maintain the temperature overnight. In this method, I incubate the yogurt in the crock, which is set back into the heating element to insulate it further. After sterilizing the jars, I set them aside to cool and pour the set and chilled yogurt in the next day.

You must be logged in to post a comment.